|
Change a folder icon |

|

|
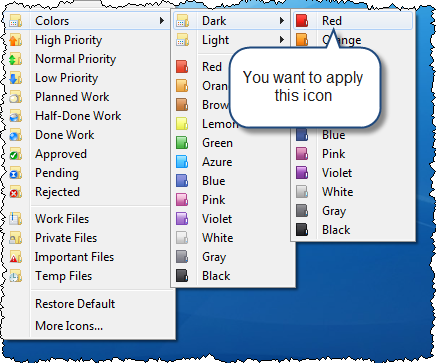
Folder Marker lets you change icons from Folder Marker, or from the context menu of the selected folder. After the installation a new entry called Mark Folder is added to the context menu of all folders. You can use this entry to replace any default icon with a new one, without having to run Folder Marker.

1. Change the folder icon from the context menu
To change the folder icon from the context menu, follow these steps:
1. Right-click the folder.
2. Select Mark Folder.
On selecting this entry, the menu appears where you can select a new icon.

Once selected, the new icon is applied to the folder instantly.

If necessary, you can restore the default icon.
2. Change the folder icon from Folder Marker
To change the folder icon from Folder Marker, follow these steps:
1. Run Folder Marker.
2. Click Browse. ![]()
The Browse dialog appears. Use this dialog to select the folder whose icon you want to change.

The path to the selected folder is shown in the Folder box (see above).
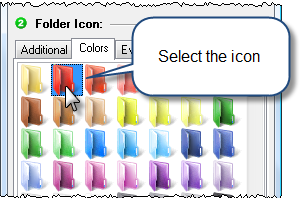
3. Select the new icon.

The library has several tabs, each with its own set of icons.
4. Select the options (if necessary).

Folder Marker offers two options that define how to apply a new icon:
*Make customized folder distributable - On selecting this option, the icon folder becomes "distributable" or "portable". A distributable icon remains unchanged when the folder is moved to a new location, such as USB stick, optical disk, another computer, or when the user reinstalls the Windows system.
*Apply selected icon to all subfolders - A new icon will be applied to the selected folder and all its subfolders.
5. Click Apply.

The selected icon is applied to the folder instantly.

If necessary, the user can restore the default icon.
Also see: